The Auth0 My Account API provides a dedicated set of endpoints for users to manage their own account information. Customers can use these APIs to build self-service experiences in their applications or progressively add details to a user account. The My Account API operates within the context of the currently logged-in user, and you can use it directly within user-facing applications.Documentation Index
Fetch the complete documentation index at: https://auth0-feat-docs-5840-account-api-auth-methods.mintlify.app/llms.txt
Use this file to discover all available pages before exploring further.
Using Auth0 domain vs. custom domainThe My Account API supports using your canonical Auth0 domain or your custom domain, but you must use the same one throughout the entire process, including:
- Getting an access token
- Setting the
audiencevalue - Calling the My Account API endpoint
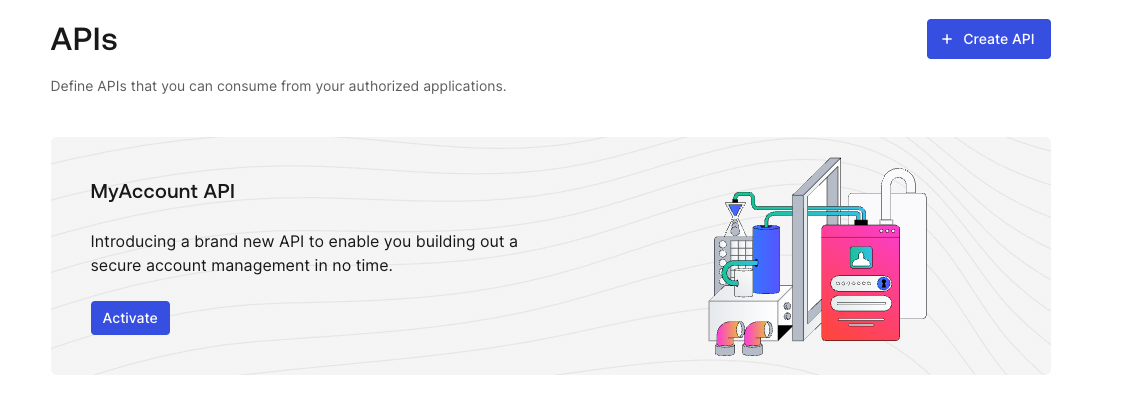
Activate the My Account API
You can activate the My Account API for your tenant in the :- Navigate to Applications > APIs.
- Locate the MyAccount API banner.
- Select Activate.
require_client_grantfor user flowsdeny_allfor client (machine-to-machine) flows
allow_all, which allows any application in your tenant to request any scope from the My Account API.
Auth0 does not recommend using allow_all for user access flows because the My Account API exposes sensitive information and operations. You should follow a least privilege principle with My Account API to ensure applications only get access to what they truly need, minimizing potential security risks.
Auth0 determines the final permissions granted to the application by intersecting the scopes allowed by the application API access policy, the Role-Based Access Control (RBAC) permissions assigned to the end user, and any user consent given (if applicable).
You cannot update the application API policy for client access to the My Account API, which means you cannot access the My Account API using the Client Credentials Flow.
Default Policy
The Default Policy provides built-in authentication assurance for the My Account API by requiring Step-up Authentication. When enabled, Auth0 automatically enforces that users have authenticated recently and with a second factor. The policy enforces 2FA within 15 minutes. Auth0 applies this rule at login and on every Refresh Token exchange:- If a user has an enrolled MFA factor, 2FA must be completed at login and again when their tokens are older than 15 minutes.
- If a user has no enrollable factor, Auth0 allows initial access but returns an
unmet_authentication_requirementserror on refresh token exchanges after 15 minutes.
The Default Policy is not compatible with Classic Login. Enable this feature if your tenant uses Universal Login or a supported embedded flow (Resource Owner Password Flow or native passkeys).
Enable Default Policy
To enable the Default Policy for the My Account API:- Navigate to Applications > APIs, then select the My Account API.
- Select the Settings tab.
- Under Default Policy, toggle on Require 2FA.
- Select Save.
Authentication requirements hierarchy
The Default Policy sits between the tenant-level MFA policy and any MFA logic you define in Actions:- Tenant MFA policy: The base default applied across all authentication on your tenant
- Default Policy: Overrides the tenant-level specifically for the My Account API
- Actions: Any MFA commands in Actions always take precedence over both
Default Policy behavior
The behavior depends on whether the user has an enrollable second factor. Users with an enrolled MFA factor For users enrolled with TOTP, email, or another supported factor:- At login, Auth0 challenges the user with their enrolled factor before issuing tokens.
- The refresh token records the authentication method and timestamp (AMR).
- On refresh token exchange within 15 minutes of the last challenge, Auth0 issues a new access token without re-challenging.
- On refresh token exchange after 15 minutes, Auth0 challenges the user again before issuing tokens.
- At login, Auth0 allows access without a second factor.
- On refresh token exchange within 15 minutes, Auth0 issues a new access token without challenge.
- On refresh token exchange after 15 minutes, Auth0 returns an
unmet_authentication_requirementserror.
When Auth0 returns
unmet_authentication_requirements on a refresh token exchange, you cannot refresh the token. Your application must restart the full authentication flow to obtain new tokens.A silent login (prompt=none) returns the same error when the user cannot satisfy the policy after 15 minutes.Get an access token
You can get an for the My Account API in the same way you’d get an access token for one of your own APIs.If you need authentication assurance beyond the Default Policy — for example, to require a specific factor or to apply requirements to only certain operations — you can use step-up authentication with Actions to define custom MFA logic. Note that Actions always override the Default Policy.
- Call Your API Using the Authorization Code Flow
- Call Your API Using the Authorization Code Flow with PKCE
Audience
The of the My Account API ishttps://{yourDomain}/me/.
Scope
The My Account API supports the following scopes:| Scope | Description |
|---|---|
create:me:authentication_methods | Allows the user to enroll a new authentication method. |
read:me:authentication_methods | Allows the user to view existing authentication methods. |
update:me:authentication_methods | Allows the user to modify existing authentication methods. |
delete:me:authentication_methods | Allows the user to delete existing authentication methods. |
read:me:factors | Allows the user to view the factors they can enroll. |
| Scope | Description |
|---|---|
create:me:connected_accounts | Allows the user to connect a new account to their user profile. |
read:me:connected_accounts | Allows the user to view the existing connected accounts linked to their user profile. |
delete:me:connected_accounts | Allows the user to delete a connected account from their user profile. |
Access token examples
Universal Login with Authorization Code Flow
Retrieving access tokens with Auth0’s Universal Login is a two-step process: request an authorization code and exchange the code for an access token. To learn more about this grant type, read Authorization Code Flow. First, make an API call to the/authorize endpoint to request an authorization code:
Next, exchange the code for an access token:
Embedded login with native passkeys
To include passkeys in your embedded application’s login flow, first request login challenge: Next, authenticate existing users:Manage authentication methods
With the My Account API, configure authentication methods so your end users are able to enroll and manage their own authentication methods. Most methods use a two-step flow: start enrollment, then confirm your enrollment. Review the table for supported authentication methods.| Type | Enrollment behavior | Enrollable via API |
|---|---|---|
emailSecondary (MFA) | POST { "type": "email" } Include email in the POST request. Auth0 sends a one-time code to the address. Submit that code as otp_code in the verify request. | Yes |
phoneSecondary (MFA) | POST { "type": "sms" } Auth0 sends a one-time code to the phone number. Submit that code as otp_code in the verify request. | Yes |
totpSecondary (MFA) | POST { "type": "totp" } The response includes:
| Yes |
push-notificationSecondary (MFA) | POST { "type": "push-notification" } The response includes a barcode_uri for the user to scan and link an authenticator app. The verify request requires only auth_session and not otp_code. Auth0 completes enrollment after the user approves the push in their app. | Yes |
recovery-codeSecondary (MFA) | POST { "type": "recovery-code" } The response includes a recovery_code. Display this value to the user immediately since you cannot retrieve it again. The verify request requires only auth_session. | Yes |
passwordPrimary | POST { "type": "password" } The response includes a policy object describing the tenant’s password requirements (e.g. minimum length, allowed character types, history, and dictionary settings). Submit new_password along with auth_session in the verify request. Auth0 validates the password against the policy before confirming enrollment. | Yes |
passkeyPrimary | POST { "type": "passkey" }. The response does not include an ID. Instead it returns:
| Yes |
webauthn-platformSecondary (MFA) | Enrollment is not currently supported. | No — read-only |
webauthn-roamingSecondary (MFA) | Enrollment is not currently supported. | No — read-only |
Enrollment flow
Enrolling an authentication method is a two-step process:- To start enrollment, make a
POSTcall to/me/authentication-methodswith the method type and any required fields. Auth0 returns anauth_sessiontoken and type-specific enrollment. - To confirm enrollment, make a
POSTcall to/me/authentication-methods/{id}/verifywith theauth_sessionand the verification credential for that method type (an OTP code, a new password, or a WebAuthn response).
confirmed field to true in subsequent GET responses.
Passkey enrollment does not include an ID in the
POST response. Auth0 only returns the ID after the verify step succeeds.Manage authentication method examples
Enroll a TOTP authenticator
Enrolling TOTP is a two-step process: starting TOTP enrollment and confirming TOTP enrollment. First, start enrollment to receive a QR code and manual secret for the user to add to their authenticator app:- Request
- Response
auth_session and id from the previous response:
- Request
- Response
List authentication methods
Retrieve all authentication methods enrolled for the current user. Theconfirmed field indicates whether enrollment has been completed.
- Request
- Response
Delete an authentication method
Remove an enrolled authentication method. Replace{id} with the method’s id from the list response.
- Request
- Response
Rate limits
During Early Access, Auth0 limits the My Account API to 25 requests per second per tenant.Cross-origin requests
If you intend to call the My Account API directly from a browser-based application (like a Single Page Application) running on a different domain than your Auth0 tenant, you may encounter browser security policies known as Cross-Origin Resource Sharing (CORS). By default, browsers block these cross-origin requests. To allow your application to successfully make requests to the API, you must add your application’s domain (its “origin”) to your client’s configuration:- Navigate to Dashboard > Applications. Select the application to view.
- Under Cross-Origin Authentication, toggle on Allow Cross-Origin Authentication.
- Locate Allowed Origins (CORS), and enter your application’s origin URL.
- Select Save.
If you do not need to use CORS for your application, ensure that Allow Cross-Origin Authentication is toggled off. Adding your application’s URL to this list tells Auth0 to trust requests from that origin, allowing your client-side application to access the API.